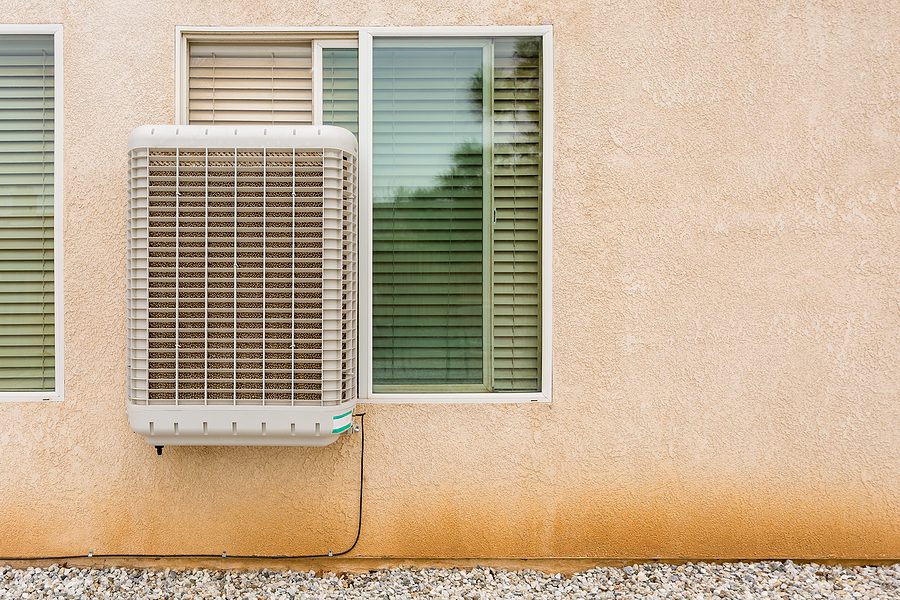
In arid climes, evaporative swamp coolers are a cost-effective cooling method. Things can go wrong, as they do with most home appliances. You may have to repair your cooler and roof if your cooler starts leaking water onto your ceiling. There are just six areas where your cooler can spread if it hasn’t been physically damaged. One by one, we’ll run through these locations. Here are a few easy ways to figure out whether your swamp cooler is leaking and how to fix it.
Step 1: Check the water supply first. An evaporative cooler’s 1/4-inch copper water pipe entering the more excellent housing frequently leaks. The following are the three most likely issues: Tighten the compression nut. It needs to be tightened. It needs to be replaced with a rubber gasket (washer), or the float valve inside has either broken or come loose.
Step 2: The float valve inlet should be inspected in this step. Water entering your reservoir may be spraying outside your pool if the leak appears to originate at the float valve input. Lift the float arm to see if all of the water spouting out of the nozzle is being directed into the water reservoir. Move the float valve further from the reservoir’s edge to remedy this.
Step 3:Look at the cooler’s pad on the front. Rust and scale accumulation on the cooler’s front screen cover is a typical problem that can cause significant damage. One of the following three issues is likely to cause a leak of this type:
1) The pad’s top is so covered in scale that water squirts out of it in a shower.
2) Due to the scale buildup on the cooler’s front screen, water may now flow freely out of its opening.
3) Water will spray or shoot out if the distributor housing is deformed and does not fit snugly over the top of the more excellent pad. It will have to be replaced if any of these three things happen.
Step 4: The drain hole on the cooler’s bottom should be inspected. There is a good chance that if water is seeping out of the drain hole, you have a simple solution. Ensure the reservoir’s water level is above the overflow pipe’s top. Adjust the water level by bending the float arm. Ensure the overflow pipe is correctly screwed into place in the drain hole; if it isn’t. As a result, you may need to replace the drain fittings and the overflow pipe
Step 5: It is essential to look at the bottom of the more excellent housing to determine if there is any leakage from the sides of the pad into the bottom of the cooler. If this is the case, inspect the pad’s sides and plastic inserts for scale accumulation. Cleaning or replacing the place may be necessary if it seems to be going on for too long. If the scale accumulation does not appear excessive, ensure that the reservoir assembly’s plastic sidewall is correctly placed, with the base sitting inside the lower reservoir’s wall. Inspect the plastic sidewall for any cracks or holes.
Step 6:The water reservoir is located at the bottom of the more excellent housing. As the most cost-effective option, you should try to tighten or perhaps replace the drain fitting. Keep an eye out for any spilled water, and adjust your water float valve if necessary. Most likely, the plastic reservoir liner needs to be changed since it has broken over time. This will save you money over buying a new pad, but it is a significant undertaking. This reservoir liner may be easily replaced by following the instructions in step 7.
Step 7:Remove the drain assembly and the overflow pipe from the drain flange in step 7. Remove the pad, the water distributor (which may be placed on top of the cooler), and the water pump from the cooler (this can remain hooked up to the distributor). Shut off both the unit’s power and water supply. Please take off the float valve by unscrewing it from the cooler side. Removing the pad requires removing both the plastic sidewalls and the bracing at the bottom. You’re done after removing the enormous plastic reservoir liner that retains all of the system’s water. Both the plastic sidewalls and the liner for the reservoir will most likely be bought on their own.